Tools

The tools are: Paint, Line, Colorize, Erase, Selection, Thicken/Thin, Nudge, Grab and Optimize.
Use the joystick up/down of your dominant hand will control the size of the tool, use the dominant hand joystick left/right to undo/redo.
Depending on which tool you are using, the tool preview on your dominant hand when not interacting with the user interface will change. Drawing tools show a brush preview, while other tools show a sphere of influence preview.
To use the tool start pressing the index trigger of your dominant hand and hold and optionally modulate the pressure as you use the tool until you release the index trigger completely.
You can quickly delete a stroke by hovering near it and pressing your dominant hand lower button (A or X). If you have a selection active, the same button will delete the selection.
You can quickly pick the color of an existing stroke (eye dropper) by pressing your dominant hand upper button (B or Y). Color picking also works from 2D image layers.
Paint
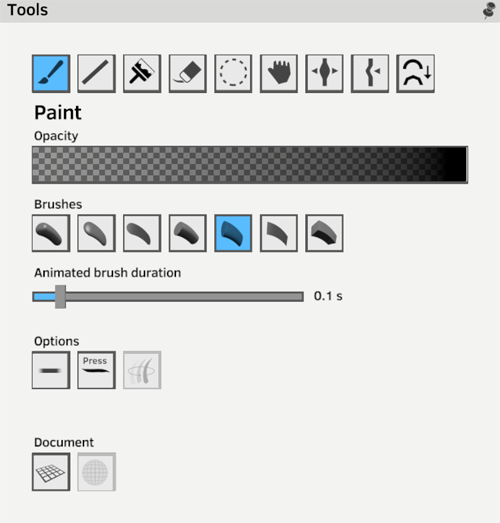
The Paint tool is the default, you can select the opacity of the paint strokes using the Opacity bar.
Brushes lets you select which brush to use. Options include different brush sections (flat, round, square, etc.) as well as different ends (rounded, flat).
The Animated brush duration parameters control the behavior of the animation brush when drawing while a clip is playing.
Taper options lets you control the transparency and thickness of the stroke. The Press option means that the parameter is controlled by the index trigger pressure, while the Auto option adds automatic taper at either ends of the stroke. The directional visibility option will fade the stroke out as the view angle differs from the angle the stroke was drawn at.
The Document section has toggles for the floor grid guide overlay as well as the brush grid helper which helps perceive depth when drawing by rendering a grid pattern on strokes near the tool.
Holding ALT (non-dominant hand index trigger) when using the paint tool will temporarily switch from the Paint to the Line tool.
Line
The Straight Line tool allows you to draw straight lines between two points. Holding ALT when using the Line tool will snap the lines to the grid axes.
Colorize
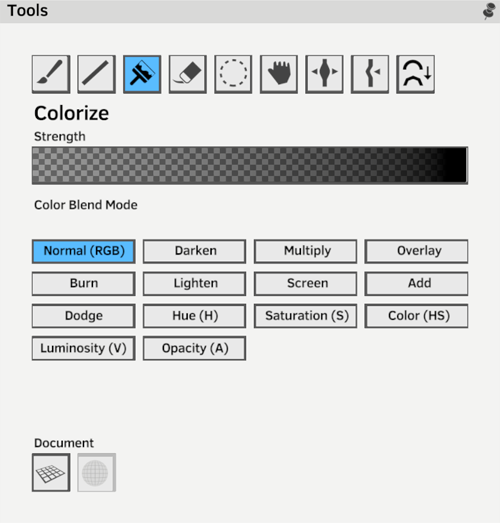
The Colorize tool modifies the colors of strokes after the fact using various blend modes to mix the current selected color with the existing stroke color.
The colorize tool has an inner “hard” and an outer “soft” spheres of influence. Hold ALT and use dominant hand joystick up/down to modify the size of the inner sphere. Without ALT both spheres are modified.
Eraser
The Eraser tool will make parts of a stroke invisible by changing the opacity of stroke points. When an entire stroke has been erased it is removed from the drawing. Otherwise, strokes can be “un-erased” by using the Colorize tool with the Opacity blend mode.
Selection
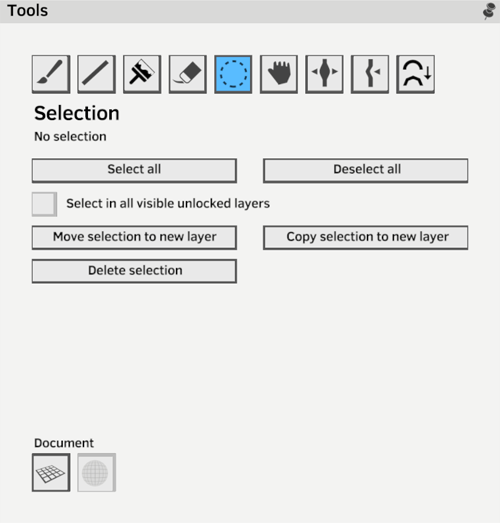
The Selection tool allows selecting strokes for manipulation or to restrict other tools to act on these strokes. You can quickly toggle between the current tool and the selection tool using the lower button on your non-dominant hand (X or A).
The selection is shown in the drawing as fading in and out slowly. The number of strokes selected is shown in the Tools panel.
Hold ALT fully to remove from selection, and partly to add to the selection. By default each new trigger press starts a new selection.
Once a selection is active it can be grabbed directly or via the gimbal controls.
Hold ALT and transform to duplicate transform the selection.
Using Redo (dominant hand joystick right) or Transform Again in the transform toolbox will repeat the last duplicate transform action.
You can use the toolbox to select all strokes in the current layer, deselect all, move the selection to a new layer, copy the selection to a new layer or delete the selection. You can also delete the selection with the dominant hand lower button (A or X). Select in all visible unlocked layer will allow multi layers selections. You can also select strokes in multiple frames by navigating frames or playing animations while using the selection tool.
Grab
The Grab tool let’s you directly manipulate strokes with a softer influence away from the center which can create elastic deformations. The tool has an inner and outsphere of influence. Inside the inner sphere, influence is maximum, i.e. direct manipulation. At the outer sphere boundary, the influence is zero.
Resizing the tool resizes both, while holding ALT while resizing the tool controls the inner sphere.
Thicken & Thin
The Thicken & thin tool lets you increase or decrease the thickness of a stroke locally. By default it will thicken the stroke, hold ALT to thin it instead.
Nudge
The Nudge tool lets you displace strokes using the velocity of your hand movement. While less precise than the grab tool, it allows to create different kinds of effects when used while playing animations.
Optimize
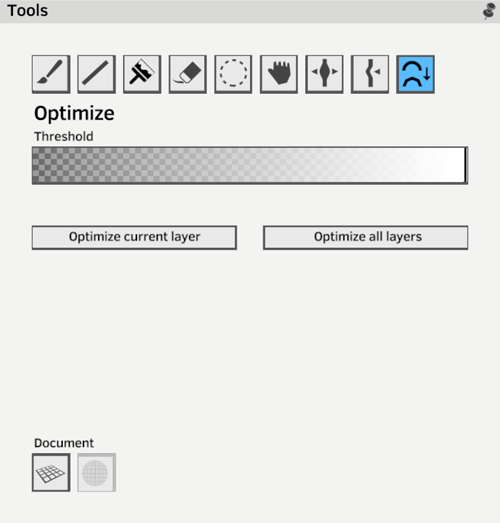
The Optimize tool lets you simplify strokes by decimating vertices. The threshold controls how aggresive the simplification is.
You can either use the tool directly in the document to spot simplify strokes, or use the buttons in the panel to optimize entire layers or the whole document.