How to Use Quill Animated Alembic in Unity
Export Alembic file from Quill
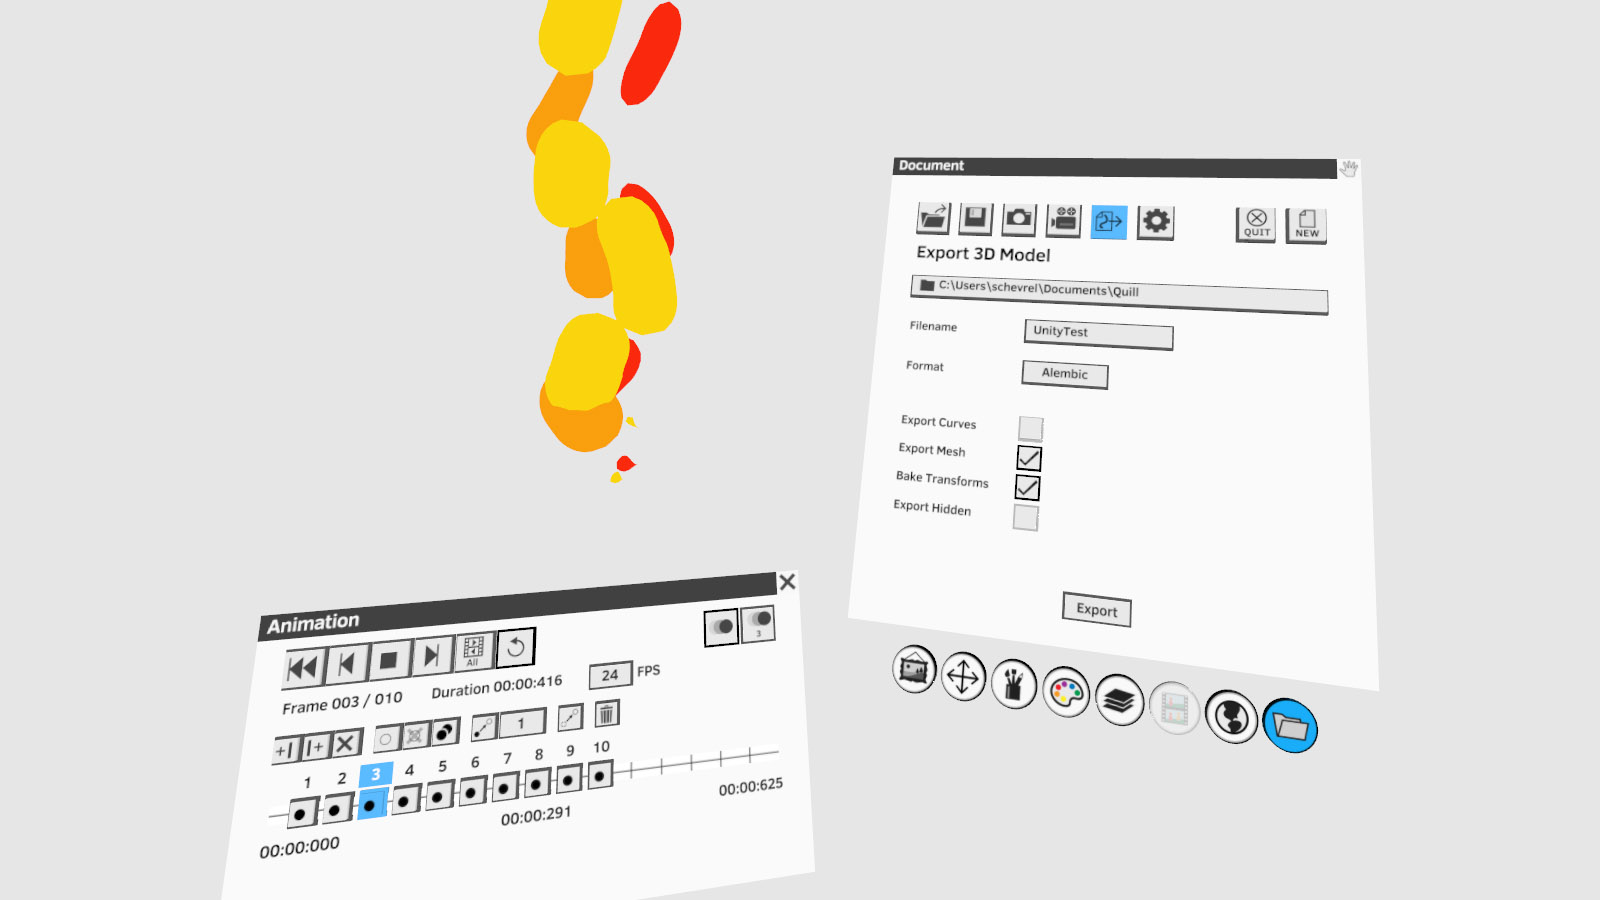
When exporting from Quill, select Export Mesh and uncheck Export Curves, we recommend you export one animated layer at a time, and not a complex file all at once. Hide all other layers and uncheck Export Hidden Layers.
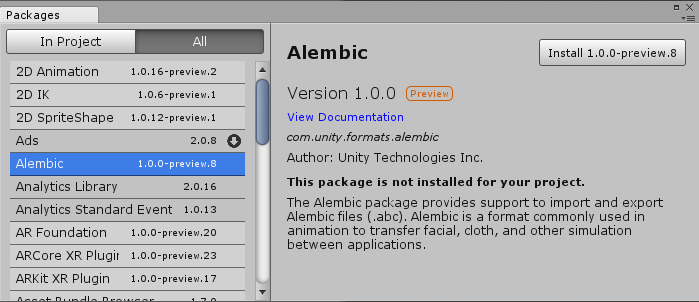
Import the Unity Alembic Importer package from Package Manager
Import the Quill shader
Download the Quill Shader for Unity at: https://quil.art/assets/QuillShader.shader
Drag the file to your project pane to import the shader.
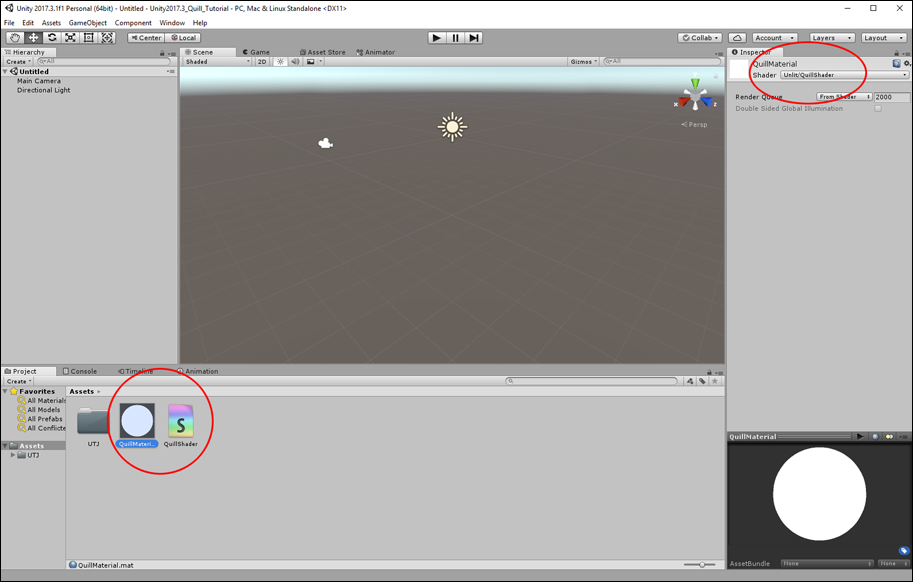
Then right click in the project pane and select Create > Material, name the new material QuillMaterial.
Select the new material, and in the Inspector, under shader at the top select Unlit > QuillShader.
Import Alembic file in Unity
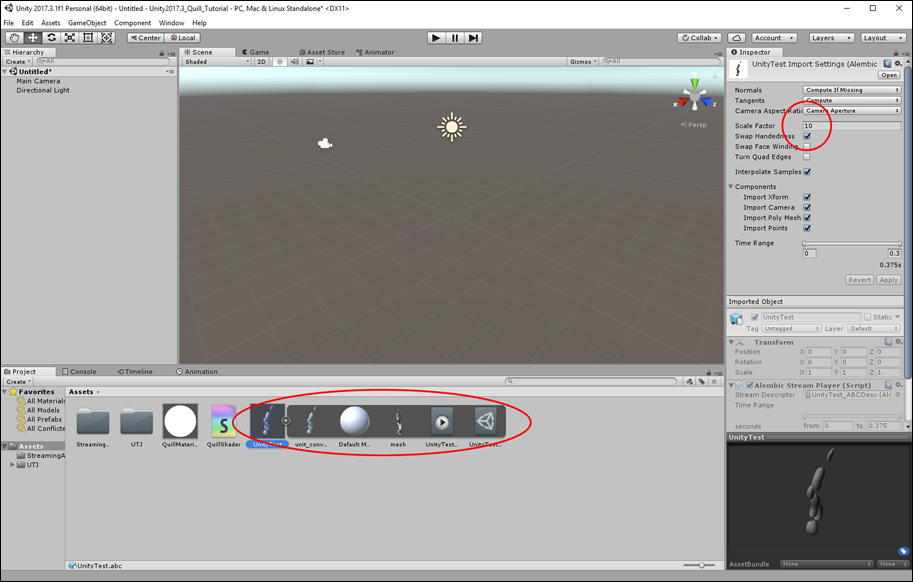
It will come as a prefab, click on the arrow button to open its content. You will need to edit the scale factor depending on your project scale, here we changed the default from 0.01 to 10.
Add the animation to the scene
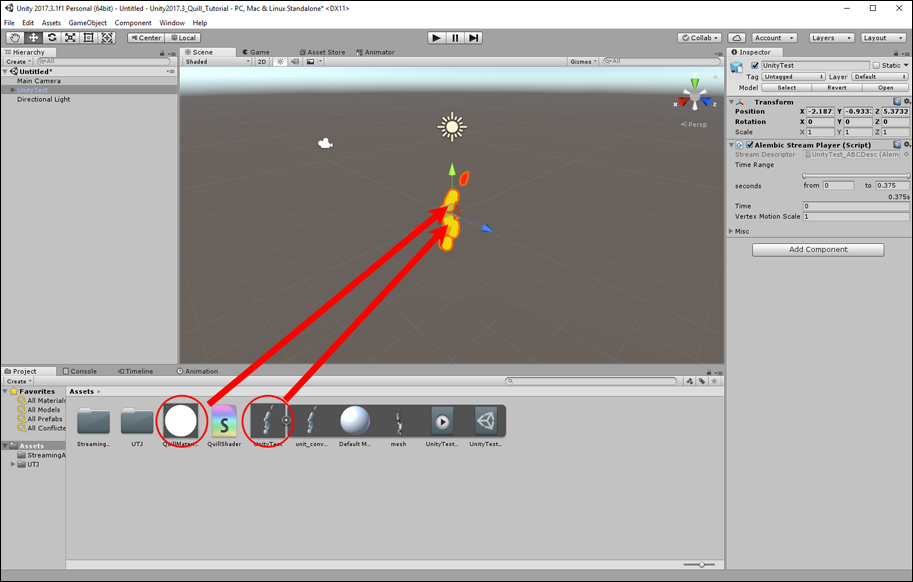
Drag the UnityTest prefab into your Scene pane. At first it will appear white. Then drag the Quill Material from the Project pane onto the model in the Scene pane, now you should see the correct colors.
Create an animation controller
Right click in the project pane and select Create > Animation Controller.
Name it UnityTestController, and double click on it.
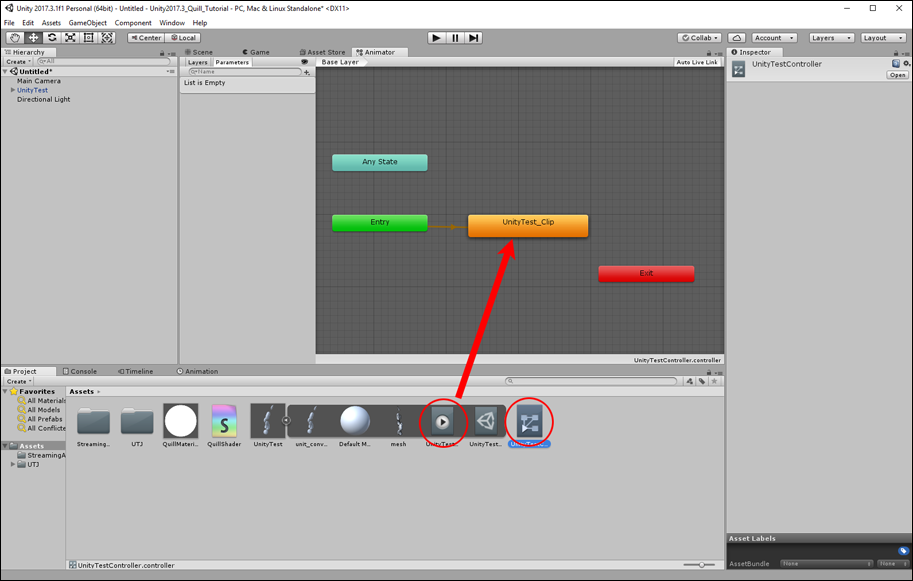
Drag the UnityTest_Clip from inside the UnityTest prefab into the Animator Pane so it’s connected as such:
Connect the controller to the scene object
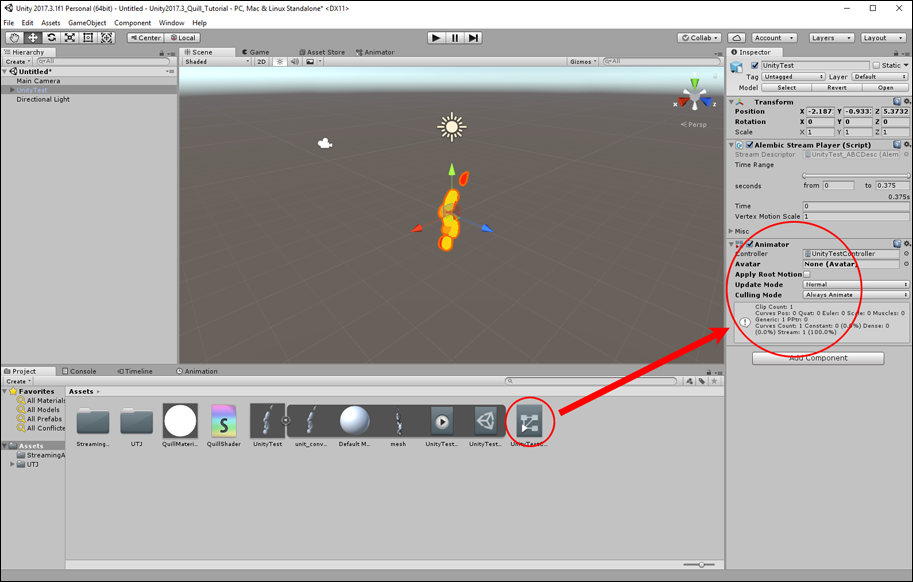
Select your scene object by clicking UnityTest in the Hierarchy pane, then drag the Animation Controller you just created into the Inspector Pane, a new Animator Component will appear.
Create timeline assets for animation
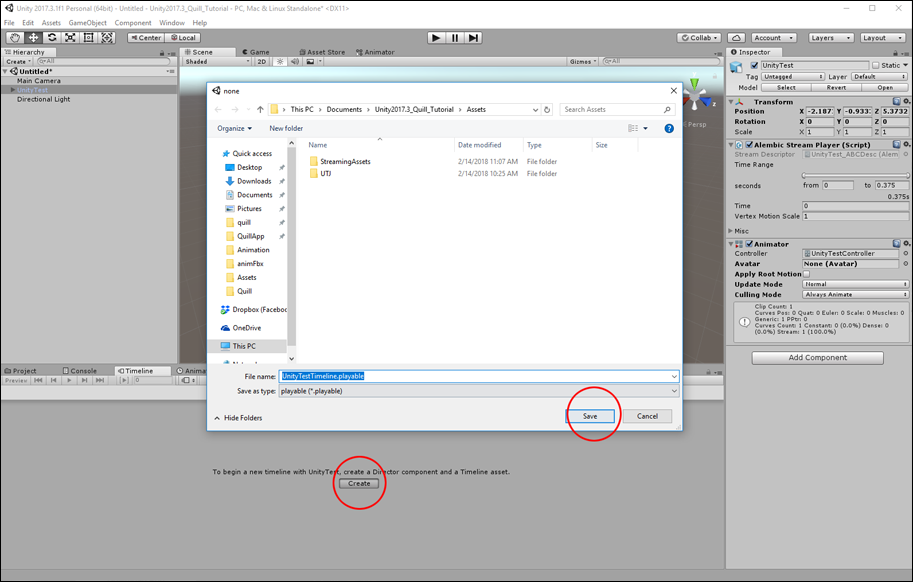
With the UnityTest scene object still selected, open the Timeline pane and click Create, then Save in the dialog box to create timeline assets for your clip.
Add the animation clip to the timeline
Right click in the Timeline on the UnityTest track and select Add From Animation Clip, then select the UnityTest_Clip.
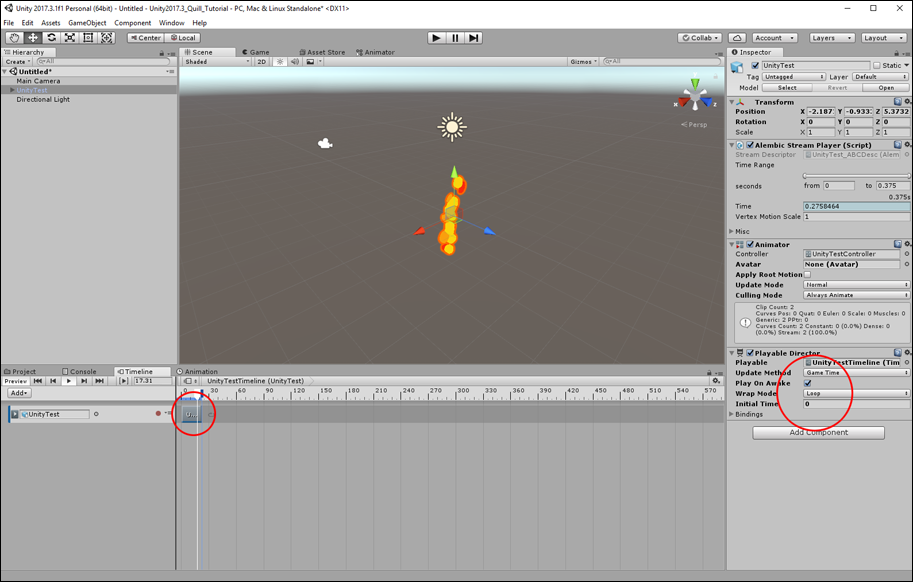
Now select UnityTest scene object in the Hierarchy again, you will now see a Playable Director component, set the Wrap mode here to Loop if desired.
Hit play in the timeline window and you will see your animation play.
